 |
|
Ancestor Tree Manager
Free genealogy program for
Windows, Linux and macOS
| Ancestor Tree Manager |
|
Navigation bar
To navigate between the pages of a website, a navigation bar is required. This can be set up as follows:
- Specify in the database for which persons a report (ancestor tree, descendant tree, genealogy) should be created, see Options
- Specify in the database which persons should be included in the list of stories, see Options
- Select the desired language for reporting: Tools
 Settings Reporting
 - Go to Reporting Set up navigation bar
- With the navigation bar can be filled with the default items, based on the database and any user-specific pages
- If desired, adjust the navigation bar items to your own taste
- View the result with and move the mouse over the bar to show any sub-items
- If everything is satisfactory, the navigation bar can be stored in the data bij pressing
-
Finally, the navigation bar must be placed on every HMTL page of the reporting:
Reporting Create complete reporting
If an empty menu is defined in the navigation bar, this menu will not be visible in the report (nor in the preview).
Default items
Which items are part of the standard partly depends on the database. In addition, the possible presence of user-specific pages also has an influence. These are the HTML pages in the folder [family tree folder]/Output/Miscellaneous.
-
Home is always shown because a website usually has a home page.
See Home page.
The right-hand column displays the path to the HTML page, relative to [family tree folder]/Output. -
Index gives access to the index on the people and is therefore perhaps the most important part of the navigation bar.
The right-hand column displays the path to the HTML page, relative to [family tree folder]/Output. -
Ancestor tree will be shown if there is one person in the database for which an ancestor tree is to be made.
In the right-hand column you can see the proband. -
Ancestor trees will be shown if there are at least two people in the database for which an ancestor tree must be made.
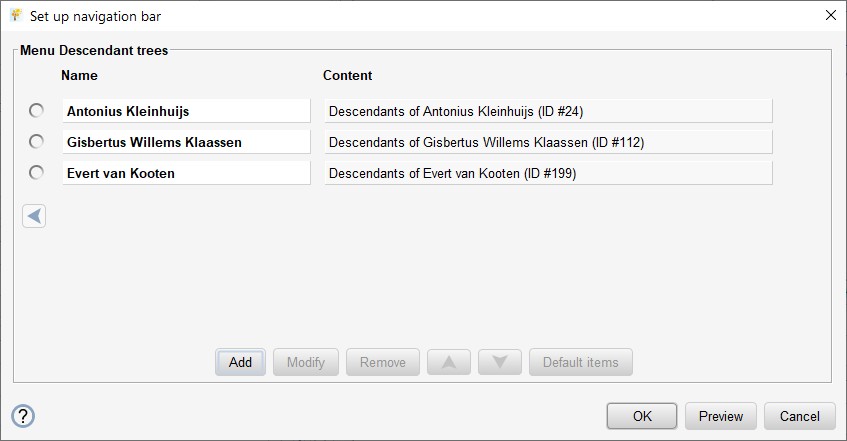
In the right-hand column 'Menu' indicates that it concerns a sub-menu.
On the far right is a button with an arrow with which the sub-menu can be viewed. -
Descendant tree will be shown if there is one person in the database for which a descendant tree has to be made.
In the right-hand column you can see the proband. -
Descendant trees will be shown if there are at least two persons in the database for which a descendant tree has to be made.
In the right-hand column 'Menu' indicates that it concerns a sub-menu.
On the far right is a button with an arrow with which the sub-menu can be viewed. -
Genealogy will be shown if there is one person in the database for which a genealogy has to be made.
In the right-hand column you can see the proband. -
Genealogies will be shown if there are at least two persons in the database for which a genealogy has to be made.
In the right-hand column 'Menu' indicates that it concerns a sub-menu.
On the far right is a button with an arrow with which the sub-menu can be viewed. -
Pictures is shown when a portrait is linked to at least one person.
The right-hand column displays the path to the HTML page, relative to [family tree folder]/Output. -
Stories is shown when at least one person has the option 'Story' checked.
The right-hand column displays the path to the HTML page, relative to [family tree folder]/Output. -
Miscellaneous is displayed when there are more than 3 HTML pages in [family tree folder]/Output/Miscellaneous.
In the right-hand column 'Menu' indicates that it concerns a sub-menu.
On the far right is a button with an arrow with which the sub-menu can be viewed containing the different HTML pages.
When there are 1-3 HTML pages in [family tree folder]/Output/Miscellaneous they will be shown directly in the main menu, each under its own name.
If a person is defined as the proband (the starting point) of a report (ancestor tree, descendant tree, genealogy) while this person is not public, the report in question will not appear with the default items.
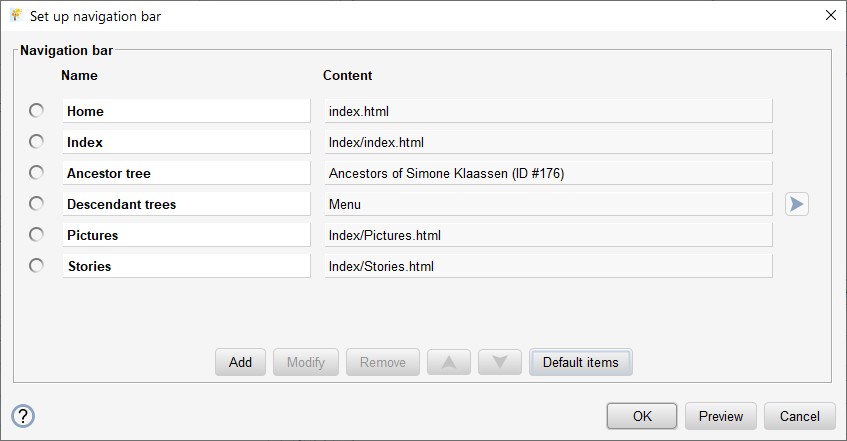
Below is an example of a default navigation bar with 1 ancestor tree and 2 descendant trees:
Making adjustments
Items can be added, modified and deleted. The order of the items can be adjusted by moving them up or down.
With an action on an existing item, the item must first be selected by clicking on the corresponding ball, followed by the desired action button.
The button resets all default items.
Add item
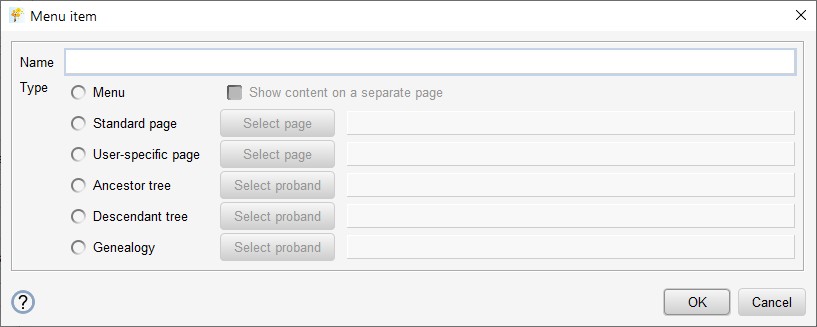
When adding a new item, a name must first be specified. Then there is a choice of different types.
With type 'Menu' there is the possibility to check that the contents of the menu must be presented on a separate page, but this is only possible with a menu at the highest level, not with a sub-menu. This option can be useful if there are a lot of items in the menu, for example if there are 20 genealogies.
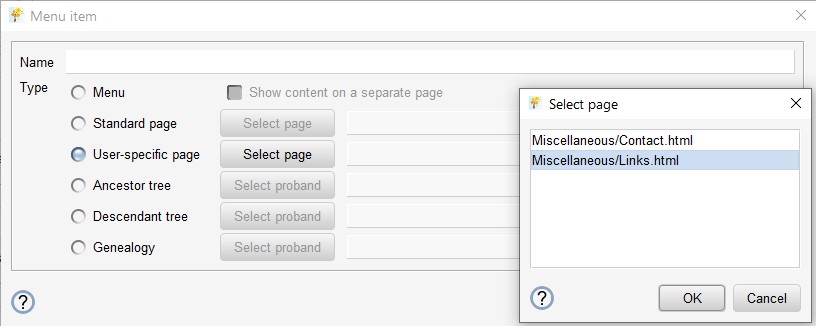
Depending on the chosen type, a dialog window can then be opened where a list of the available items is displayed.
Checking the navigation bar
A check function is available to check whether the contents of the navigation bar still correspond to the
contents of the database and whether there are any other irregularities:
Reporting Check navigation bar.
Possible notifications may include:
| Link to Miscellaneous/Contact.html is missing | the page cannot be reached via the navigation bar |
| Link to Miscellaneous/Contact.html is obsolete | the page no longer exists |
| Link to Index/Stories.html is missing | the page is not accessible via the navigation bar |
| Link to Index/Stories.html is obsolete | the page is no longer created because there is no person with a story in the database |
| Link to Index/Pictures.html is missing | the page is not accessible via the navigation bar |
| Link to Index/Pictures.html is obsolete | the page is no longer created because there is no person with a portrait in the database |
| Link to descendant tree from Jan Klaassen's (#168) is missing | the page is not accessible via the navigation bar |
| Link to descendant tree from Jan Klaassen's (#168) is obsolete | the page is no longer created because the person is not classified as a proband |
| Link to descendant tree from person with ID #168 is obsolete | the page is no longer created because there is no person with this ID in the database |